Cream of Beef Soup Recipe

by Sandra Merville Hart

I have often used canned cream of chicken soups and bullion in casseroles and crockpot recipes. It never occurred to me to make this from scratch until I watched a chef prepare it on a cooking show.

I tweaked some recipes until I was happy with the results. What a game-changer this has been for me in the past year!

This homemade soup has enhanced the flavor of every dish that I’ve used it in—all of them. I highly recommend it.

The soup takes about 20 minutes to prepare. I usually cook it while making the main dish.

Stock, which is water enriched by the food cooked in it, is an important ingredient in numerous soups. Homemade stock brings full-bodied flavor to recipes. Here’s a recipe for homemade chicken stock:  https://sandramervillehart.com/2017/05/15/preparing-chicken-stock/.

Chicken stock can be substituted for the beef stock when preparing chicken-based recipes. Turkey stock (or chicken stock if you can’t find turkey) can be substituted when preparing turkey-based recipes. In the same way, use vegetable stock for cream of celery. (When I next need cream of celery soup, I’ll simmer a celery stalk in the vegetable stock for a few minutes to draw out that flavor.)

Ingredients

½ cup butter

6 tablespoons all-purpose flour

2 cups of beef stock

2 cups of milk

Melt the butter in a medium saucepan. Stir in flour. Once combined, add the stock and milk. Stir until blended. Cook over medium-low heat until thick and creamy, about 15 to 20 minutes, stirring occasionally.

This recipe makes 4 cups of cream soup. If your casserole recipe calls for 1 can of soup, prepare half the recipe.

What a game-changer this has been for me in the past year!

This homemade soup has enhanced the flavor of every dish that I’ve used it in—all of them. Everyone I’ve served it to has noticed the difference. I highly recommend it.

It’s also good when served over rice or as the base for creamy soups. Enjoy!

Momma’s Brisket

by Sandra Merville Hart

KD Holmberg, my dear friend and award-winning author, brought an amazing beef brisket to a writing retreat earlier this year. She had baked it ahead of time, and it only required reheating for a hearty and delicious supper. It was such a generous portion that it provided two meals! Not only is KD a talented author, but she is also an amazing cook.

The barbeque sauce she brought was the perfect complement to the beef dish. She graciously permitted me to share both recipes with you.

I’ve been chomping at the bit to make a big meal. When family members came for supper, I jumped at the chance.

4 ½ – 5 lb. beef brisket

1 tablespoon Liquid Smoke

1 teaspoon garlic powder

1 teaspoon onion powder

1 teaspoon celery seed

1 ½ teaspoons salt

2 tablespoons Worcestershire sauce

The brisket needs to marinate overnight or up to 24 hours.

I used a glass 13×9 dish for my 5-pound brisket.

Combine the ingredients in a bowl. Rub the blended marinade over both sides of the brisket. Cover with plastic wrap and refrigerate overnight.

Remove from the fridge at least a few minutes before baking. (I allowed mine to sit out for about an hour. Some recipes suggested allowing the meat to return to room temperature.)

I used a glass 13×9 dish to bake my 5-pound brisket. Aluminum foil was arranged along the bottom and sides, with enough to cover the meat while cooking. Spray lightly with cooking spray.

Bake according to the following schedule:

       First two hours at 250 degrees

       Second two hours at 275 degrees

       Last two hours at 300 degrees

After 6 hours of baking, KD’s recipe called for the brisket to be grilled over medium coals, while slathering with barbeque sauce.  My husband is our grill master and he was entertaining guests while I cooked, so I compromised. Instead of grilling, I opened the aluminum foil to allow it to continue baking with the brisket exposed. The purpose of grilling is to achieve a “crust” on the outside and it usually takes 10-15 minutes.

I added another 15 minutes to achieve the fork-tender quality I love. Also, I didn’t slather on the barbeque sauce while it baked because my husband likes plain brisket.

After retrieving it from the oven, I tented the aluminum foil over the top and allowed the meat to rest for 30 minutes before slicing.

Everyone loved the brisket! It was so tender that my husband sliced it a little thicker to keep the slices together. The barbeque sauce drizzled over the slices made for a mouth-watering, delicious main dish.

Pictured above is leftover brisket for our second meal. Everyone was in such a hurry to eat—me included!—from the delicious aromas that I forgot to snap a photo. 😊

Thanks, KD, for sharing your wonderful recipes. She’s an awesome cook, as I’m certain you will agree once you make this dish.

Barbeque Sauce Recipe

by Sandra Merville Hart

Award-winning author and dear friend, KD Holmberg, made this sweet, thick barbeque sauce and brought it to a writing retreat earlier this year. Delicious! Not only is KD a talented author, she is also an amazing cook.

She also baked us beef brisket for supper one evening. She graciously permitted me to share the recipe with you. The brisket recipe will be shared in another post.

I have been waiting for an opportunity to make this delicious sauce, so when family members came for supper, I jumped at the chance.

1 quart tomato catsup

¾ cup prepared mustard

1 teaspoon onion salt

1 teaspoon cayenne pepper

½ teaspoon black pepper

½ teaspoon salt

½ cup Worcestershire sauce

2 cups brown sugar

½ teaspoon garlic powder

1 tablespoon paprika

¼ pound butter

After the previous ingredients have simmered for thirty minutes, remove from heat and stir in the following ingredients:

1 cup beef consommé

1/3 cup Liquid Smoke

½ teaspoon chili powder

Combine the dry ingredients in a bowl (excluding the chili powder).

I didn’t realize I was out of onion salt until I started to prepare the barbeque sauce. I made onion salt (mixed 1 tablespoon onion powder with 3 tablespoons of salt) and used 1 teaspoon for this recipe.

Combine the catsup, mustard, Worcestershire Sauce, and butter in a large saucepan and stir well. Add the prepared dry ingredients, stirring until blended. Turn on low heat. I used room-temperature butter that quickly melted. Stir frequently.

When the sauce begins to softly simmer, cook on low for thirty minutes. Continue to stir frequently.

Remove from heat and stir in the final 3 ingredients—beef consommé, Liquid Smoke, and chili powder. I didn’t have consommé on hand, so I substituted with beef stock. It turned out great.

Sweet barbeque sauce is the type I favor, and this is my new favorite! My guests complimented the creamy, thick sauce so highly that I sent some home with them. 😊

This recipe makes about 6 cups. Store the unused portion tightly in Mason jars and store it in the refrigerator so that it will last about a month.  

Edible Flowers in Recipes

by Sandra Merville Hart

Fresh and dried flowers have been used in cooking for centuries, yet not all flowers are safe for consumption. Additionally, not all parts of the flower are safe to eat. To be edible, flowers must be grown without pesticides and sprays, so ask if you’re not certain about the flowers in the market.

A pioneer recipe for Dandelion Salad in Log Cabin Cooking has dandelion greens, violets, pansies, nasturtiums, and calendula listed among its ingredients.

Old-Fashioned Woodstove Recipes has a recipe for Dandelion Greens.

Early American Cookery calls for rose water as an ingredient in Lemon Sponge Cake. Sugar and almonds were pounded into a paste with rose water in the Macaroon recipe. Rose water was also used in Hard Gingerbread. Both rose water and orange flower water are ingredients in Rich Plum or Wedding Cake. Pound Cake and Plum Pound Cake used a half glass or full glass of rose water. (How many ounces the glass contained is not listed. The first time making these old recipes is a trial-and-error process. 😊) 

I’ve often made dishes using recipes in Buckeye Cookery and Practical Housekeeping, published in 1877. If edible flowers were among the ingredients, I chose another recipe, but I didn’t recall that happening often. When leafing through about fifty of the nearly 400 pages of recipes, I discovered a Cornstarch Cake recipe that was to be “flavored with either lemon or rose.”

So cooking and baking with edible flowers is not a new practice. I’ve seen them most often in recipes for salads, teas, and cakes. Cookies can be topped with sugared flower petals.

Modern dishes like Rose Petal Granola, Rhubarb Rose Water Syrup, Daffodil Cake, Strawberry and Goat Cheese Crostini, and Flower Focaccia call for edible flowers.

One cook wrote of freezing rose petals in ice cubes. What a festive idea!  

Many contestants have utilized edible flowers in episodes of The Great British Baking Show.

Perhaps I should quit shying away from using them in new recipes. 😊

Sources

Buckeye Cookery and Practical Housekeeping, Applewood Books, Originally published in 1877.

Copeland, Blythe. “Our Favorite Edible Flower Recipes That Are Colorful and Delicious,” Martha Stewart 2025/06/09 https://www.marthastewart.com/edible-flower-recipes-7503243.

“Edible Flowers,” 101cookbooks.com 2025/06/09 https://www.101cookbooks.com/edible-flowers/.

Hale, Sarah Josepha. Early American Cookery “The Good Housekeeper,” 1841, Dover Publications, 1996,

Hawkins, Linda J. The Unspoken Language of Fans & Flowers, Heart to Heart Publishing, 2007.

“How to Cook with Edible Flowers,” Savannah Bee Company 2025/06/09 https://savannahbee.com/blogs/the-latest-buzz/how-to-cook-with-edible-flowers.

Old-Fashioned Woodstove Recipes, Bear Wallow Books, 1988.

Swell, Barbara. Log Cabin Cooking: Pioneer Recipes & Food Lore, Native Ground Music, Inc., 1996.

Edible Flowers

by Sandra Merville Hart

I’ve always appreciated the fragrant beauty of fresh flowers served on my plate, but never considered eating them as part of my dinner. After learning about the variety of edible flowers, I’m eager to try them.

Boiled hibiscus makes a slightly acidic beverage.

Gladiolus tastes a bit like lettuce.

Lemon Verbena’s lemony flavor can be steeped to serve as tea.

Lilacs also taste like lemons with a pungent floral aroma.

For salads, use arugula for a nutty, peppery flavor. Chives add a mild onion taste. Basil tastes like lemon and mint. Adding borage will give a hint of cucumber flavor while fennel provides hints of licorice.  

When fried in butter, young dandelion buds have a similar taste to mushrooms.

Dill is often added to cheese dips, seafood, and sour cream.

One teaspoon of dried marigold, jasmine, chamomile, rose, or yarrow petals can be steeped in boiling water for five to ten minutes to make a fragrant cup of tea.

Violets are sweet.

Roses are also sweet and fragrant, but the petals contain bitter white portions that should be removed.

Both safflower and calendula are described as “poor man’s saffron.”

Lavender has a floral flavor. Lavender oil may be poisonous.

Chicory buds and nasturtium buds can be pickled.

Carnations have a spicy, peppery taste while English daisies have a tangy, leafy flavor.

Fresh and dried flowers have been used in cooking for centuries, yet cooks and bakers must be careful. Some flowers are poisonous or otherwise unsafe for consumption, so check with food or plant experts to understand which are safe to eat. Also, flowers must be grown without pesticides and sprays to be edible.

Cooks and bakers have prepared dishes with edible flowers at least as early as the Roman Empire.

After doing all this research on edible flowers, I’ll be happy to sample different floral flavors.

Sources

“Edible Flowers,” 101cookbooks.com 2025/06/09 https://www.101cookbooks.com/edible-flowers/.

Hawkins, Linda J. The Unspoken Language of Fans & Flowers, Heart to Heart Publishing, 2007.

“How to Cook with Edible Flowers,” Savannah Bee Company 2025/06/09 https://savannahbee.com/blogs/the-latest-buzz/how-to-cook-with-edible-flowers.

Sundae Bars–A Fun Addition to Summer Celebrations

by Sandra Merville Hart

I bought ingredients for a sundae bar for a recent family birthday at my daughter’s suggestion. What a great idea this turned out to be!

Two choices of ice cream started the fun. (Most people chose both chocolate and cookies and cream. 😊) Ingredients were placed in ramekins and arranged on the table. My daughter enlisted her first-grader’s help as excitement built for the ice cream bar that took only minutes to prepare. What a joy it was to watch the magic happen.

Below is the list of ingredients I used for our sundae bar. Choose your favorite ice creams and change the toppings for your family’s preferences.  

Ingredients

Whipped cream

Chopped walnuts

½ gallon Chocolate ice cream

½ gallon Cookies and Cream ice cream

Variety of sprinkles

Caramel syrup

Hot fudge syrup

Vanilla blueberry granola

Chocolate chips

Mini M&Ms

Mini marshmallows

Mini Peanut Butter Cups

Bananas

Strawberries

These were arranged in the center of the table and everyone made their own sundae. Honestly, that’s half the fun!

Everyone’s creative side came into play. The more ingredients, of course, the bigger the dessert, and let’s just say that few were able to finish. I didn’t mind at all.

Delicious! As if it could be anything else with all those ingredients. My sundae was heavy on the walnuts, granola, bananas, and strawberries. So refreshing! Yet it wasn’t nearly as much fun as watching everyone choose their own toppings.

What a great summertime celebration for both children and adults! I will do this again.

Enjoy!

Pimento Cheese Recipe

by Sandra Merville Hart

A friend got me hooked on pimento cheese spread while attending a writing retreat. I bought a couple of different brands upon returning home, but neither was as delicious as the brands available in the Carolinas.

My mother had bought sliced pimento cheese for sandwiches when I was a child, but I haven’t seen that in delis for years.

I read several recipes for the spread and then tweaked them.

Ingredients

8 ounces cream cheese, softened

1 4-ounce jar diced pimento, drained

¼ teaspoon garlic powder

¼ teaspoon ground cayenne pepper

¼ teaspoon onion powder

½ cup mayonnaise

2 cups sharp shredded Cheddar cheese

Using a strainer, drain the pimentos into a bowl. This can take about 10 minutes.

Smooth the cream cheese into a large mixing bowl. Sprinkle on the garlic powder, cayenne pepper, and onion powder.

Allow the flavors to set together for a couple of minutes and then mix in the mayonnaise. Stir in the pimentos.

Add the shredded cheese. Mix together.

Keep refrigerated.

This pimento cheese tastes good on a variety of crackers or as a sandwich. It is good for about two months—at least, that’s as long as it has been in my fridge before being devoured. 😊

I make this often. When my sister visits, she usually asks if I have any pimento cheese in the fridge. She loves it too!

Roasting and Brewing Fresh Coffee in a Tides of Healing Scene

by Sandra Merville Hart

The final book in the Spies of the Civil War Series, Tides of Healing, shows that everyone had difficulty adjusting to Union occupation in Vicksburg after surrender.

In an early scene, Southern belle Savannah Adair wants to make coffee for the wounded men convalescing in her parlor. The feisty young woman, who has never even boiled an egg, makes a watered-down flavorless beverage unrecognizable as coffee. That prompts one of the wounded soldiers to demonstrate how to roast and brew the coffee.

It’s a lighthearted scene in the midst of one challenge after another.

But how many modern coffee drinkers would do any better when faced with handfuls of raw coffee beans?

The authors of an 1877 cookbook urged readers to buy raw coffee grains or small amounts of freshly roasted beans. They preferred Mocha and Java or a mix of the two flavors.

Place washed raw coffee beans in a skillet. Begin by roasting them in a moderate oven (probably about 350 degrees) and then increase temperature so they roast quickly, stirring often. The beans are ready when tender, brittle, and a rich dark brown color. Test for doneness by pressing one bean with your thumb—it will crumble if done.

Coffee beans can also be roasted on a stove burner but make sure to stir constantly.

Add a lump of butter to the hot, roasted beans or let them cool and stir in a beaten egg white. This clarifies the coffee beans.

Simmer a few minutes and then strain the beans.

Grind roasted coffee beans. Many people owned coffee grinders similar to the one in the photo. Turning the crank grinds the roasted beans. The grounds are collected in the drawer beneath the grinder. Some grinders attached to the wall.

Allow one heaping tablespoon of ground coffee per person and add “one for the pot.” Mix the grounds with an egg (part or all of the egg) with enough cold water to moisten it thoroughly.

Boil a pint of water per person less one pint. For example, if ten people are drinking coffee, use nine pints. (If you find this confusing, read the original recipe!)

Place the prepared coffee grounds into “a well-scalded coffee-boiler.” Then add half the boiling water to the coffee pot.

Stop up the spout with a rolled-up cloth to lock in the flavor. Boil for five minutes “rather fast,” stirring as the mixture boils up. Then simmer for ten to fifteen minutes.

Add the remaining boiled water to the coffee when time to serve.

Store the unused roasted coffee beans in a tightly-closed tin.

Read Tides of Healing to discover how they fare with coffee making and so many other challenges following the city’s surrender.

Amazon

Sources

Compiled from Original Recipes. Buckeye Cookery and Practical Housekeeping, Applewood Books, 2011.

Chocolate Pudding Recipe

by Sandra Merville Hart

I often bake different pies during the holidays that include old favorites while trying new-to-me recipes and putting my own spin on them.

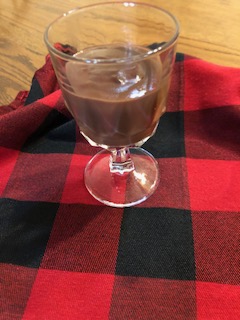
I found this recipe in a family cookbook. This will make one pie. I’ve made it as pudding and also in a pie. I prefer the pudding. There are several in my family who will probably be trying this one for Christmas celebrations this year.

Ingredients

1 1/8 cup water

7/8 cup milk (3/4 cup + 1/8 cup)

1/8 cup cocoa

1/3 cup all-purpose flour

¾ cup sugar

1/8 teaspoon salt

½ teaspoon vanilla

2 egg yolks

Combine milk and water in a double-boiler. (I don’t have a double-boiler. Instead, I used a metal mixing bowl over a medium saucepan, which works well.) Stir and then heat on medium until lukewarm. This will take 5-10 minutes. Stir occasionally.

Meanwhile, combine cocoa, flour, sugar, and salt in a separate bowl. Stir together until blended well. In another small bowl, blend egg yolks and vanilla together.

Once the milk is warm, add the cocoa mixture and egg yolks. Whisk together until well blended. Lower the heat to medium low and stir often until thickened and fully cooked. This took about 10 minutes. Remove from heat.

Cool the chocolate filling for about 5 minutes, stirring occasionally to release the steam.

Pour into serving bowl or individual serving glasses and chill until ready to serve. It makes 6 servings.

As an alternative: If you are making this as a pie, pour the filling into a baked pie shell and refrigerate until serving. Top with a meringue, if you like.  

This is a deliciously creamy, smooth chocolate pudding. The cocoa takes the chocolatey flavor beyond the cook-and-serving pudding mixes. Everyone loved it except for the one who doesn’t like chocolate—he prefers the boxed pudding mix.

Whether you serve it as pie or pudding, I hope you enjoy this chocolatey dessert as much as our family does.

Enjoy!

Christmas Dinner in the 1870s

by Sandra Merville Hart

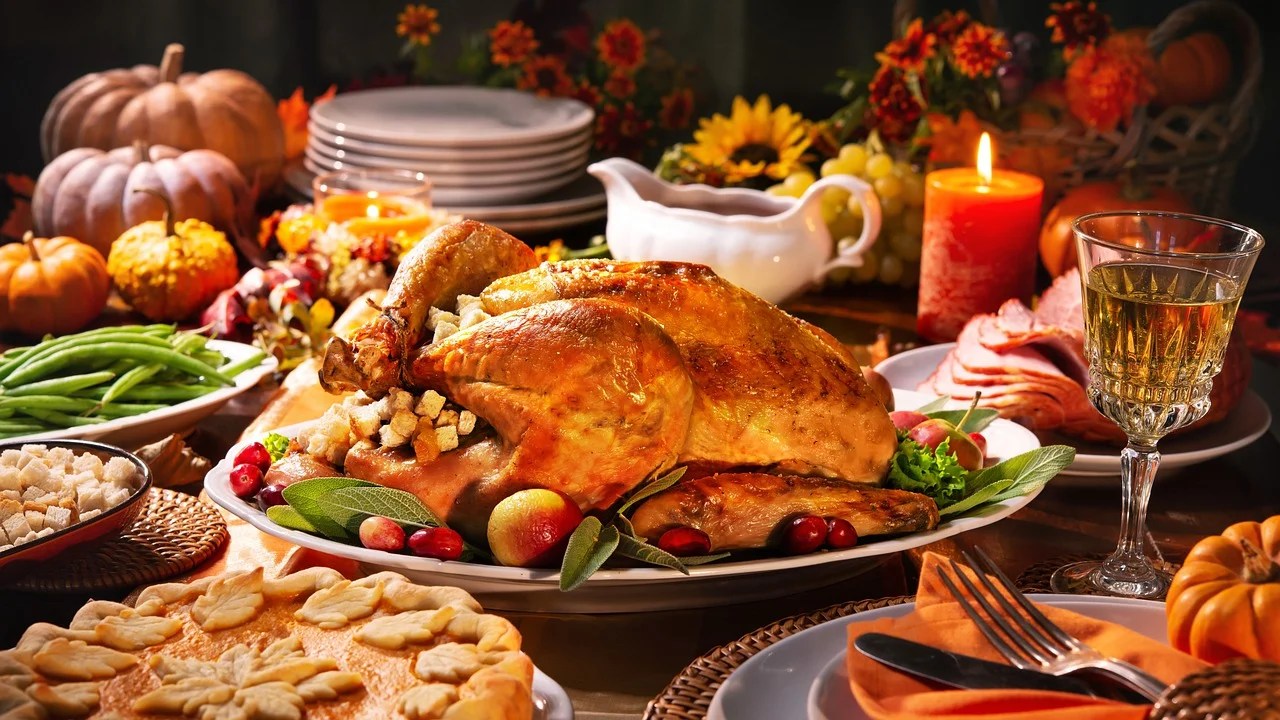
Christmas dinner is a big meal at our house. We roast a turkey large enough to feed the family and provide leftovers for pot pies and sandwiches. Side dishes are plentiful with everyone’s holiday favorites with pie for dessert—both pumpkin and chocolate. There are plenty of Christmas cookies too.

I thought this was a big meal until I read suggestions for Christmas dinner in an 1870s cookbook.

Here are the meats:

Clam soup, baked fish, Holland sauce;

Roast turkey with oyster dressing and celery or oyster sauce, roast duck with onion sauce, broiled quail, chicken pie

There were plenty of side-dishes:

Baked potatoes in jackets, sweet potatoes, baked squash, stewed carrots, turnips, canned corn, southern cabbage, tomatoes, canned pease (peas);

Graham bread, rolls; plum jelly, crabapple jelly;

Salmon salad or herring salad, pickled cabbage, mangoes, French or Spanish pickles, Chili sauce, gooseberry catsup;

Beets, sweet pickled grapes, and spiced nutmeg melon

There were lots of dessert choices:

Christmas plum pudding with sauce, Charlotte Russe;

Pies—mince, peach, and coconut;

Cakes—citron, White Mountain, pound, Neapolitan, and French loaf;

Cookies—peppernuts, ladyfingers, centennial drops, almond or hickory nut macaroons;

Candy—coconut caramels, chocolate drops;

And even ice cream!—orange or pineapple

Beverage choices were coffee, tea, and Vienna chocolate.

If large families (grandparents, aunts, uncles, and cousins) prepared even a third of these dishes, they undoubtedly had one thing in common with us—leftovers!

Sources

Compiled from Original Recipes. Buckeye Cookery and Practical Housekeeping, Applewood Books, 1877.